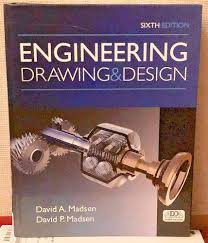
To develop knowledge and skills needed to produce and interpret engineering drawings
|
Module 1: Foundations of Representing Technical Bodies |
||
|
|
1.1 standardization in drawing: 1.2 drawing formats, folding of drawing formats, 1.3 types of lines, scales, lettering, 1.4 drawing equipment, 1.5 title block; |
|
|
Module 2: Principles of orthographic projection |
||
|
|
2.1 first angle and third angle orthographic projection, 2.2 general rules of projection, 2.3 layout of views on a drawing format, 2.4 projecting features between views; |
|
|
Module 3: Techniques of free-hand sketching: |
||
|
|
3.1 free-hand drawing of machine parts in orthographic projection; Sectioning: 3.2 indication of cutting plane, 3.3 hatching, rules of and practices in sectioning, 3.4 Types of sections. Basic Dimensioning: 3.5 General principles of dimensioning. |
|
|
Module 4: Essential Problems in Descriptive Geometry |
||
|
|
4.1 Isometric drawing: construction of isometric drawing, 4.2 curves in isometric drawing, 4.3 isometric circles and arcs; 4.4 Introduction to oblique representation; |
|
|
Module 5: Sections of geometrical solid objects |
||
|
|
5.1 Interpenetration and development: 5.2 development of geometrical objects, 5.3 Interpenetration curves in machine drawing. |
|
|
i. |
Teaching and Learning Activities: |
i. Lectures and Discussions Interactive lectures, group discussions, and case studies to facilitate understanding and application of concepts. ii. Hands-on Training Practical exercises and demonstrations to enhance practical skills and knowledge application. iii. Group Projects and Presentations Students given projects and conduct presentations v. Online Resources and Self-directed Learning Self-paced learning modules, quizzes, and forums to encourage independent learning and exploration. |
- Teacher: Joel Kiritha
- Teacher: Yasini Misanga